DIY Dog Snuffle Mat: Fun & Easy Steps
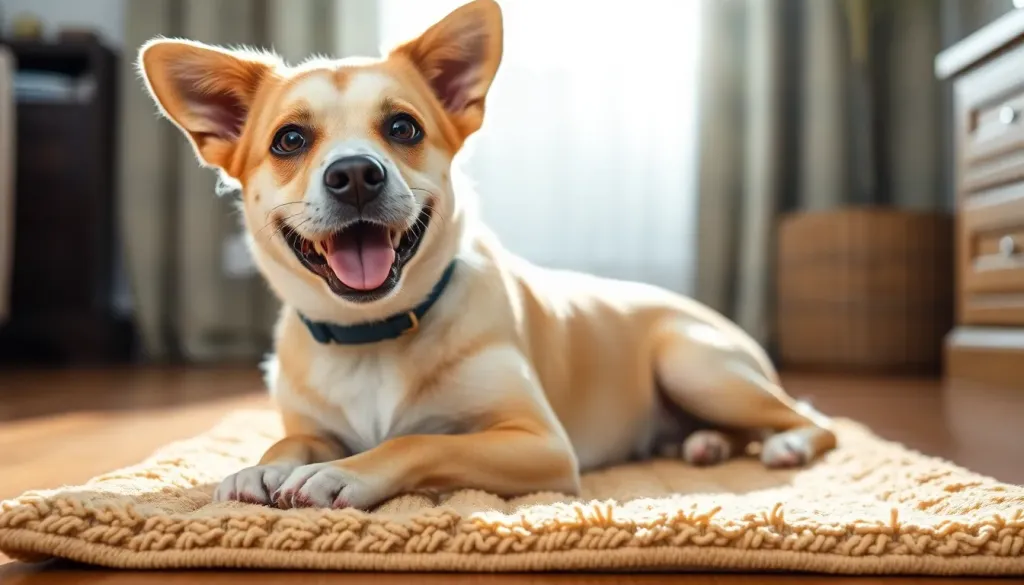
Making a snuffle mat for dogs is a simple, rewarding DIY project that provides exceptional mental stimulation and enrichment for your furry friend. Using just a rubber sink mat, fleece fabric, and scissors, you can create this engaging puzzle toy in under an hour—no sewing required—that encourages natural foraging behaviors and can even slow down fast eaters.
Veterinary Disclaimer
Important: While snuffle mats are generally safe and beneficial enrichment tools, this article provides general guidance based on research and personal experience. Always supervise your dog during use, especially if they’re aggressive chewers. If your dog shows signs of distress, digestive issues, or has ingested fabric, consult your veterinarian immediately. The information here does not replace professional veterinary advice.
Why I Started Making Snuffle Mats for My Pack
When I first brought my Golden Retriever, Bailey, home five years ago, I quickly realized that mental stimulation was just as crucial as physical exercise. My high-energy rescue, Max, would get bored even after long walks, leading to destructive chewing and restless behavior around the house. That’s when I discovered snuffle mats—and honestly, they’ve been a game-changer for our family.
After purchasing a few commercially-made versions and watching my dogs absolutely love the foraging experience, I decided to try making my own. Not only did it save money (we’re talking about $5-10 versus $30-40 for store-bought options), but I could customize the size, colors, and difficulty level for each of my three very different dogs. Now I make them as gifts for fellow dog parents, and the feedback has been incredible.
What Is a Snuffle Mat and How Does It Work?
A snuffle mat is essentially a puzzle feeder made from strips of fabric tied to a rubber base, creating a dense, shaggy surface where you can hide treats or kibble. Dogs use their powerful sense of smell to “forage” through the fabric strips, mimicking the natural scenting and hunting behaviors their ancestors used in the wild.
According to canine behavior research, a dog’s sense of smell is 10,000 to 100,000 times more acute than humans, and engaging this primary sense provides profound mental enrichment. When my dogs use their snuffle mats, I can literally see them become calmer and more focused—it’s like watching them solve a delicious puzzle.
The Science-Backed Benefits of Snuffle Mats
Mental Stimulation and Cognitive Health
Snuffle mats engage a dog’s exceptional olfactory abilities, providing crucial “nose work” that keeps their brains active and healthy. This type of mental enrichment can:
- Relieve boredom and prevent destructive behaviors by giving dogs a constructive outlet for their energy
- Trigger pleasure centers in the brain through natural foraging activities
- Maintain cognitive function in senior dogs, helping to slow age-related mental decline
- Provide a “job” for working breeds who need mental challenges beyond physical exercise
My oldest dog, a 12-year-old Border Collie mix named Luna, has shown remarkable mental sharpness since I started incorporating snuffle mat sessions into her daily routine. Her veterinarian actually commented on how alert and engaged she remains compared to other senior dogs.
Slower Eating and Digestive Health
For dogs that inhale their food—and believe me, Max is guilty of this—snuffle mats can be lifesaving. Fast eating can lead to serious digestive issues including:
- Regurgitation and vomiting
- Stomach pain and discomfort
- Bloating and potentially life-threatening gastric dilatation-volvulus (GDV)
By forcing dogs to search for individual pieces of kibble or treats, snuffle mats naturally slow down mealtime by 5-10 times. What used to take Max 30 seconds now takes him 10-15 minutes, and his post-meal stomach upset has completely disappeared.
Stress and Anxiety Reduction
Sniffing is inherently calming for dogs. When Bailey gets anxious during thunderstorms or when we have guests over, I bring out her snuffle mat with some high-value treats, and within minutes, her body language shifts from tense to relaxed.
The act of foraging and using their nose activates the parasympathetic nervous system, promoting relaxation and reducing cortisol levels. It’s like doggy meditation, and the effects can last for hours after the activity ends.
Low-Impact Physical Activity
While not a substitute for walks or play, snuffle mats provide valuable activity for:
- Dogs recovering from surgery or injury who need mental stimulation but must limit physical movement
- Senior dogs with mobility issues who can still enjoy enrichment activities
- Rainy or extremely hot days when outdoor exercise isn’t safe or comfortable
- Puppies learning impulse control and focus
Understanding the Risks: What Every Dog Owner Must Know
While I’m a huge advocate for snuffle mats, I’ve learned through experience that they’re not without risks. Supervision is absolutely essential, especially when you’re first introducing the mat to your dog.
Choking and Ingestion Hazards
The biggest risk is fabric ingestion. Snuffle mats are not indestructible, and some dogs—particularly aggressive chewers—may pull off and swallow pieces of fleece. This can result in:
- Choking emergencies
- Intestinal blockages requiring surgery
- Gastrointestinal upset
I learned this the hard way when Max managed to tear off a fleece strip during an unsupervised moment. Thankfully, he passed it naturally, but it was a $800 emergency vet visit and a terrifying lesson. Now I never leave my dogs alone with their snuffle mats, and I inspect the mats before each use for loose or fraying pieces.
If your dog is an aggressive chewer or has a history of eating non-food items (pica), a fabric snuffle mat may not be appropriate. Consider alternative enrichment options like durable rubber puzzle feeders instead.
Treat-Related Risks
The treats you use matter enormously:
| Risk Factor | Problem | Solution |
|---|---|---|
| Size | Too large = choking hazard; too small = difficult to find | Use pea-sized treats or regular kibble |
| Texture | Hard treats can get stuck; wet treats create hygiene issues | Choose dry, crumbly options |
| Ingredients | Toxic substances like xylitol or allergens | Always verify treats are dog-safe |
Hygiene and Bacterial Growth
This is something many first-time snuffle mat makers overlook: food particles, oils, and moisture create the perfect environment for bacterial growth. I wash my snuffle mats in a laundry bag on cold every 2-3 uses, or immediately if I’ve used anything moist.
Signs your mat needs immediate washing:
- Visible food residue or staining
- Unpleasant odors
- Sticky or damp fabric
- Any mold growth
How to Make a Snuffle Mat for Dogs: Complete Step-by-Step Guide
After making over a dozen snuffle mats for my own dogs and friends, I’ve refined my process to be as simple and efficient as possible. Here’s exactly how I do it.
Materials You’ll Need
For a standard 12” x 15” mat, gather:
- 1 rubber sink mat with drainage holes (available at dollar stores, home improvement stores, or online for $3-8)
- Look for mats with evenly-spaced holes approximately 0.5” apart
- Avoid mats with very large holes or irregular spacing
- 1 to 1.5 yards of fleece fabric (costs $5-10 depending on quality)
- Fleece works best because it’s soft, durable, and doesn’t fray
- Choose multiple colors for visual interest—I love using 3-4 coordinating colors
- Anti-pill fleece lasts longer
- Sharp fabric scissors (or a rotary cutter if you have one)
- Optional: Measuring tape or ruler (though precision isn’t critical)
Total cost: $8-18 for a homemade mat versus $30-50 for store-bought!
Preparing Your Fleece Strips
This is the most time-consuming part, but I promise it’s meditative once you get into a rhythm. I usually do this while watching TV in the evening.
Step 1: Cut your fleece into strips
- Cut strips approximately 1-2 inches (2.5-5 cm) wide and 6-7 inches (15-18 cm) long
- Don’t stress about perfection—varied sizes actually make the mat more interesting for dogs
- You’ll need approximately 200-262 strips for a medium-sized mat
- I cut several strips at once by folding the fabric and cutting through multiple layers
Pro tip: I organize my strips by color in separate piles or bags. This makes the assembly process much faster and lets me create patterns if desired.
Assembling Your Snuffle Mat
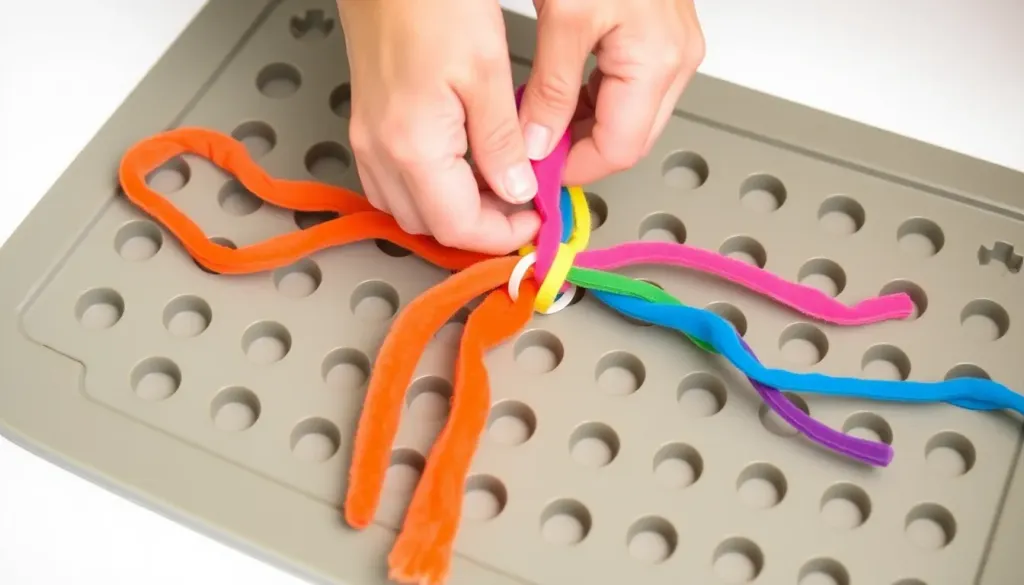
Step 2: Tie the fleece strips to the rubber base
- Take one fleece strip and hold both ends together
- Push one end through a hole in the rubber mat from the top (shaggy) side
- Push the other end through an adjacent hole from the same top side
- Flip the mat over to the smooth rubber side
- Tie the two ends together with a single overhand knot
- Pull snugly but not too tight—the knot should be secure but the fabric shouldn’t bunch excessively
- Flip the mat back to the top side and fluff the strips
Step 3: Repeat until complete
- Work systematically across the mat, filling every hole (or every other hole for a less dense mat)
- I typically use a pattern like: 2 strips of color A, 2 strips of color B, 1 strip of color C
- Leave the bottom side knots exposed—these help the mat grip the floor
Time investment: Plan for 45-90 minutes for your first mat. I can now complete one in about 30 minutes.
Final Quality Checks
Before introducing the mat to your dog:
- Run your hands through the fabric to ensure no sharp edges from the rubber base poke through
- Check that all knots are secure by gently tugging strips
- Inspect for any loose threads that could be pulled off easily
- Give it a quick shake to remove any loose fibers from cutting
How to Use Your Homemade Snuffle Mat Safely
Making the mat is only half the journey—using it correctly ensures your dog gets maximum benefit while staying safe.
Choosing the Right Treats
Best options for snuffle mats:
- Regular kibble (this is what I use most often—it’s perfect for weight management)
- Small training treats broken into pea-sized pieces
- Freeze-dried meat treats (salmon, chicken, liver)
- Small pieces of dog-safe jerky
- Vegetable options: tiny carrot cubes, steamed green bean pieces, blueberries
- Sweet potato bites (dehydrated or fresh)
Avoid these:
- Wet or sticky treats (create hygiene issues)
- Large, hard treats that are difficult to retrieve
- Anything containing xylitol, chocolate, grapes, or other toxic ingredients
- Treats your dog has sensitivities or allergies to
Portion Control and Frequency
This is crucial for preventing weight gain—I learned this when Bailey started putting on pounds!
Guidelines I follow:
- If using kibble: Count the snuffle mat portion as part of their daily food allowance, not in addition to it
- If using treats: Keep total treat calories to less than 10% of daily caloric intake
- Frequency: We use snuffle mats 4-5 times per week, not at every meal
For reference, my 60-pound Golden Retriever gets about 1/4 cup of her regular kibble scattered in the snuffle mat, which I subtract from her dinner portion.
Introducing the Mat to Your Dog
Start easy and build difficulty:
- First session: Sprinkle treats visibly on top of the fabric so your dog understands the concept
- Second session: Gently nestle treats just below the surface
- Subsequent sessions: Hide treats deeper and in different areas
- Advanced: Use treats with varying scent intensities
When I first introduced Luna to snuffle mats at age 11, she was confused for about 30 seconds before her nose took over and she became absolutely obsessed. Max figured it out immediately (food motivation is powerful!), while Bailey needed three sessions to really understand the game.
Supervision and Safety Rules
My non-negotiable rules:
- ✅ Always supervise while your dog uses the mat
- ✅ Remove the mat once all treats are found (prevents frustration and fabric chewing)
- ✅ Inspect before each use for damage or loose pieces
- ✅ Watch for signs of frustration (excessive whining, destructive behavior, giving up)
- ✅ End on a positive note even if they haven’t found everything
If your dog starts chewing the fabric rather than foraging, calmly remove the mat and try again later with easier treat placement. This is a learning process!
Maintenance and Hygiene: Keeping Your Snuffle Mat Clean
I cannot stress this enough: a dirty snuffle mat is a bacterial breeding ground. After one unfortunate incident where I got lazy about washing and Bailey developed an upset stomach, I became religious about mat hygiene.
Washing Schedule
My routine:
- After every 2-3 uses with dry treats
- Immediately after any use with moist treats or dog drool accumulation
- Weekly if used daily
- Anytime there’s visible debris or odor
How to Wash Your Snuffle Mat
Method 1: Machine washing (my preferred method)
- Shake out loose debris outside
- Place mat in a mesh laundry bag or pillowcase (protects your washing machine)
- Wash on cold or warm cycle with pet-safe detergent
- Air dry completely—the rubber base can deteriorate in high heat
- Fluff the fleece strips before storing
Method 2: Hand washing
- Fill a basin with warm water and mild detergent
- Submerge the mat and agitate gently
- Squeeze (don’t wring) to remove excess water
- Rinse thoroughly until water runs clear
- Hang to air dry completely
Critical: Never use the mat while it’s even slightly damp. Moisture + food particles = bacteria paradise.
Troubleshooting Common Issues
”My dog just chews the fabric instead of foraging”
This happened with Max initially. Solutions that worked:
- Use extremely high-value treats to redirect focus to foraging
- Start with treats completely visible on top
- Hold the mat steady while they learn
- Practice short 2-3 minute sessions initially
- Consider if your dog is ready for this type of enrichment
”My dog gets frustrated and gives up”
- You’re hiding treats too deeply—go back to basics
- Ensure treats have strong scent
- Make an exaggerated show of placing treats so they see you do it
- Help them find the first few treats to build confidence
”The mat slides around on my floor”
- Place it on a carpet or rug
- Put a non-slip mat underneath
- Use in a corner where walls provide stability
- Some dogs prefer the mat in their crate where it’s contained
”My dog finished in 30 seconds”
- Hide treats much deeper in the fabric layers
- Use smaller, harder-to-find pieces
- Create a denser mat with more fleece strips
- Mix in some of their regular kibble with special treats so they have to search longer
Advanced Variations and Customizations
Once you’ve mastered the basic snuffle mat, the creative possibilities are endless! Here are modifications I’ve made for my pack:
Size Variations
- Small/travel mat: 6” x 8” rubber mat with 1” x 4” strips (perfect for trips or small dogs)
- Large/family mat: Multiple rubber mats tied together for multi-dog households
- Strip length variations: Longer strips (8-10”) create more complex hiding spots for experienced dogs
Difficulty Levels
Easy: Sparse fabric, treats visible
Medium: Standard density, treats nestled below surface
Hard: Very dense fabric, treats buried deeply
Expert: Mix of strip lengths, treats wrapped in fabric strips
Scent Training Integration
I’ve started using the snuffle mat for basic scent work:
- Hide treats scented with specific essential oils (dog-safe only!)
- Gradually reduce treat pieces while keeping scent
- Eventually work toward detection training
This has been especially engaging for Luna, my Border Collie mix who needed a “job” in her senior years.
Comparing DIY vs. Store-Bought Snuffle Mats
Having owned both, here’s my honest assessment:
| Factor | DIY Homemade | Store-Bought |
|---|---|---|
| Cost | $8-18 | $30-60+ |
| Customization | Complete control over size, colors, density | Limited to available designs |
| Durability | Depends on materials and construction quality | Generally professional-quality stitching |
| Replacement | Cheap and easy to make new ones | Expensive to replace |
| Learning Experience | Satisfying project, understand construction | Convenient but less personal |
| Warranty | None | Often 30-90 day guarantees |
My verdict: DIY is absolutely worth it, especially for your first mat. You can always buy a professionally-made one later for comparison, but starting with homemade gives you flexibility and saves money.
Frequently Asked Questions
How long does a homemade snuffle mat last?
With proper care and supervision, a well-made DIY snuffle mat can last 6 months to 2+ years. Mine typically last about a year with three dogs using them regularly before the fabric starts showing significant wear or some knots loosen. The longevity depends heavily on:
- Your dog’s chewing habits (gentle foragers vs. aggressive chewers)
- How frequently you use it
- Quality of materials (anti-pill fleece lasts longer)
- Washing and maintenance routine
I inspect my mats weekly and consider it time for retirement when I see frayed strips, loose knots, or deteriorating rubber. At that point, I simply make a new one—the low cost makes replacement painless.
Can I use old t-shirts or towels instead of fleece?
Technically yes, but I don’t recommend it based on my experiments. Fleece is superior for several reasons:
- Doesn’t fray when cut (cotton fabrics unravel)
- Softer on dogs’ noses and faces
- More durable for repeated washing
- Provides better texture for hiding treats
I tried making a mat with old t-shirts once to be eco-friendly, and it started falling apart within two weeks. The cotton frayed, creating actual choking hazards from loose threads. If you want to upcycle materials, make sure they’re tightly woven and won’t shed fibers.
Is a snuffle mat suitable for puppies?
Yes, with modifications and extra supervision! Snuffle mats are actually excellent for puppies because they:
- Teach impulse control and patience
- Build confidence through successful foraging
- Provide mental stimulation during critical developmental periods
- Offer a positive activity when you need them calmly occupied
Puppy-specific considerations:
- Use softer, longer fleece strips (easier for clumsy noses)
- Supervise constantly—puppies are mouthy and more likely to chew fabric
- Keep sessions short (3-5 minutes) to match their attention span
- Use primarily kibble rather than special treats to avoid overfeeding during growth
I’ve successfully used snuffle mats with puppies as young as 8-10 weeks, always under close supervision. It’s also a great way to start teaching “leave it” and “wait” commands.
How do I make a snuffle mat more challenging for my smart dog?
My Border Collie mix Luna figured out basic snuffle mats within three uses, so I’ve developed several difficulty-increasing strategies:
Advanced techniques:
- Wrap treats in individual fleece strips before hiding them
- Place treats at the bottom of the fabric requiring deeper digging
- Use primarily kibble with occasional high-value treats (they must search thoroughly)
- Create fabric “knots” or bundles where treats can hide in pockets
- Add different textures by incorporating fabric strips of varying thickness
- Hide treats in specific patterns that change each session
- Reduce total number of treats while maintaining same search area
I also rotate between multiple mats with different densities and configurations so Luna never knows what to expect. The unpredictability keeps her engaged session after session.
Can I make a portable snuffle mat for travel?
Absolutely! I made a compact travel version specifically for camping trips and hotel stays. Here’s how:
- Use a smaller rubber mat (6” x 8” or even a silicone trivet)
- Cut shorter fleece strips (3-4 inches instead of 6-7)
- Create a less dense mat (skip every other hole)
- Store in a gallon-sized ziplock bag with a few treats sealed separately
The smaller size makes it easy to pack, and it’s been a lifesaver during travel when my dogs need mental stimulation in unfamiliar environments. Bailey gets anxious in hotels, and a quick 10-minute snuffle mat session before bed helps her settle beautifully.
Final Thoughts: Why Every Dog Parent Should Try This
Making snuffle mats has become one of my favorite aspects of dog ownership. There’s something deeply satisfying about creating enrichment tools with my own hands, knowing exactly what goes into them, and watching my dogs’ pure joy during foraging sessions.
The benefits extend far beyond the activity itself. I’ve noticed improvements in my dogs’ overall behavior, their ability to settle calmly at home, and even their confidence levels. Luna, at 12 years old, still lights up when she sees me pull out the snuffle mat. Max’s digestion issues have virtually disappeared since I started using the mat as his primary feeding method. And Bailey’s anxiety during thunderstorms is far more manageable with this calming activity available.
If you’re looking for an affordable, customizable, and genuinely beneficial enrichment activity, I cannot recommend homemade snuffle mats highly enough. The hour you invest in making one will pay dividends in your dog’s mental health and happiness for months to come.
Start with a simple, basic mat using the instructions in this guide. You don’t need to be crafty or have any special skills—if I can do it while watching Netflix, anyone can. Your dogs will thank you, and you’ll wonder why you didn’t start making these sooner.
Now grab some fleece, a rubber mat, and scissors—your dog’s new favorite puzzle awaits!