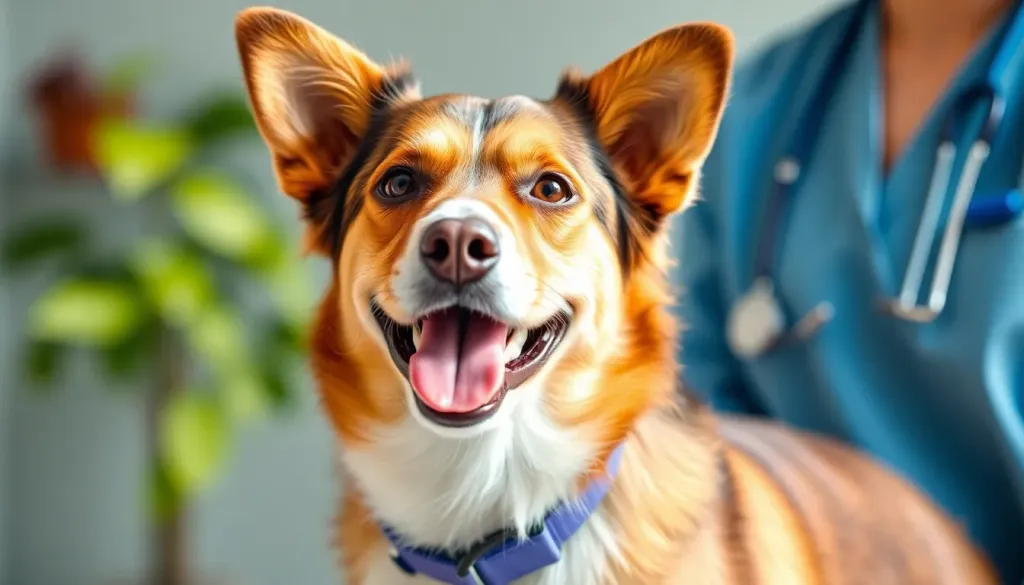
Help Your Rescue Dog Adjust to Their New Home

Helping a rescue dog adjust to a new home requires patience, consistency, and understanding of the widely-recognized “3-3-3 rule”—3 days of feeling overwhelmed, 3 weeks of settling in, and 3 months of fully feeling at home. This structured approach creates a safe environment, establishes predictable routines, and uses positive reinforcement to build trust, ultimately transforming an anxious rescue into a confident, secure family member.
Veterinary & Behavioral Disclaimer
Important Notice: While this guide provides comprehensive behavioral guidance for rescue dog adjustment, every dog is unique with individual trauma histories and needs. If your rescue dog displays severe fear-based aggression, extreme anxiety, resource guarding, or other concerning behaviors, consult a certified veterinary behaviorist (DACVB) or certified professional dog trainer (CPDT-KA) immediately. This article does not replace professional behavioral assessment or veterinary care.
Understanding the Rescue Dog Adjustment Period: The 3-3-3 Rule
According to the ASPCA Pro, the adjustment timeline for rescue dogs typically follows a predictable pattern that helps set realistic expectations:
| Timeline | What’s Happening | What You’ll Notice |
|---|---|---|
| First 3 Days | Feeling overwhelmed, scared, shut down | May not eat, hide, refuse walks, minimal interaction, possible house accidents |
| First 3 Weeks | Starting to settle in, testing boundaries | True personality emerges, may challenge rules, increased confidence, possible behavioral issues surface |
| First 3 Months | Building trust, feeling truly at home | Fully comfortable, strong bond forming, consistent behavior patterns, genuine personality shines |
You can do this! Understanding this timeline prevents discouragement during those challenging first weeks. Your rescue dog isn’t being “difficult”—they’re processing an enormous life change and need your patience and consistency.
How to Help a Rescue Dog Adjust to a New Home: Essential Foundation Steps
Create a Designated Safe Space Immediately
Before your rescue dog arrives, set up a quiet sanctuary space where they can decompress without pressure. According to Alliance Therapy Dogs, this safe zone is critical for reducing initial anxiety.
What to include in your safe space:
- Comfortable bedding in a quiet corner away from household traffic
- Water bowl always accessible
- A few safe toys (avoid overwhelming with too many choices initially)
- Crate with door open (if crate training) as an optional den
- Baby gate to section off the area while maintaining visual connection
Patience is key! Some rescue dogs spend hours or even days in their safe space initially—this is completely normal and healthy coping behavior.

Establish a Predictable Daily Routine from Day One
Dogs thrive on predictability—it’s their security blanket. Create and maintain a consistent schedule:
Sample daily routine structure:
- Morning (Same time daily): Potty break → Breakfast → Short walk
- Midday: Potty break → Brief training session (5-10 minutes) → Rest time
- Afternoon: Play session → Potty break → Quiet time
- Evening: Dinner → Walk → Calm bonding time → Final potty break
Why this works: According to ASPCA’s adoption guidance, predictable patterns activate a dog’s sense of safety through classical conditioning—they learn that their environment is reliable, which reduces anxiety-driven behaviors like destructive chewing or house-soiling.
First Night with a Rescue Dog: Setting Up for Success
The first night often determines your dog’s initial trust level. Here’s your action plan:
Step-by-Step First Night Protocol
1. Keep expectations realistic: Your rescue dog likely won’t sleep through the night initially.
2. Decide on sleeping arrangements:
- Option A: Crate in your bedroom (maintains connection while establishing boundaries)
- Option B: Dog bed next to your bed (for dogs with severe separation anxiety)
- Option C: Safe space room with baby gate (allows visual connection)
3. Create a calming bedtime routine:
- Final potty break 30 minutes before bed
- Dim lights gradually
- Provide a quiet, boring environment (no exciting play before bed)
- Consider calming aids: white noise machine, covered crate, or calming pheromone diffuser
4. Prepare for possible whining or crying:
- Differentiate between: Anxiety whining vs. genuine need for potty break
- If anxiety: Wait for 3-5 seconds of quiet before responding (avoid reinforcing anxious behavior)
- If potty need: Calmly take outside with minimal interaction, immediately return to sleep area
Practical example: Say “Settle” in a calm, low voice when placing your dog in their sleep space. Over time, this becomes a conditioned cue for bedtime. Avoid enthusiastic goodnight rituals that energize rather than calm.
Managing Fearful Rescue Dog Tips: Building Confidence Through Positive Reinforcement
Fear is the most common challenge with rescue dogs. Transform fear into confidence using proven behavioral psychology:
The Counter-Conditioning Approach
Counter-conditioning pairs scary stimuli with positive experiences, gradually changing emotional responses.
Practical implementation steps:
-
Identify fear triggers: Loud noises? Men with beards? Other dogs? Fast movements?
-
Create a fear hierarchy: List triggers from least scary (Rating 1) to most terrifying (Rating 10)
-
Start with Rating 1-2 triggers: Begin where your dog shows interest but not panic
-
Pair trigger with high-value rewards:
- Doorbell rings (far away) = Special treat appears
- Person walks by (at distance) = Jackpot of chicken pieces
- New object appears = Play session begins
-
Gradually decrease distance/increase intensity: Only progress when your dog shows confident, relaxed body language
Real-world example:
❌ Don’t say: “It’s okay, it’s okay” while petting a fearful dog (this reinforces fearful behavior)
✅ Do say: “Yes!” in an upbeat tone when your dog looks at the trigger calmly, then immediately reward
Body Language Reading: Your Most Important Skill
Fearful dog signals to recognize:
- Whale eye: Showing whites of eyes while looking sideways
- Tucked tail: Tail between legs or low
- Lip licking: Frequent tongue flicks when not around food
- Yawning: Stress yawning (different from tired yawning)
- Frozen posture: Complete stillness, holding breath
- Cowering or crouching: Low body position
When you notice these signs: Immediately increase distance from the trigger, stop what you’re doing, and give your dog space. Never force interaction—this creates learned helplessness and damages trust.
Introducing Rescue Dog to Other Pets: Strategic Integration Protocol
Multi-pet households require careful, methodical introductions. Rushing this process is the #1 cause of permanent conflict between pets.
Pre-Introduction Preparation (Days 1-3)
Before any face-to-face meeting:
- Scent swapping: Rub a towel on existing pet → let rescue dog investigate → repeat opposite direction
- Separation maintenance: Keep pets completely separate with visual barriers
- Exercise before meeting: Tired dogs are calmer dogs—walk your rescue and existing pets separately first
- Neutral territory selection: Choose a fenced yard or quiet outdoor space, never inside the home initially
Step-by-Step Introduction Protocol
For Dog-to-Dog Introductions:
Step 1 - Parallel Walking (Days 4-7):
- Two handlers walk dogs 20 feet apart
- Walk in same direction (not face-to-face)
- Reward calm behavior with “Yes!” + treat
- Gradually decrease distance over multiple sessions
Step 2 - Controlled Visual Contact (Week 2):
- Allow dogs to see each other through baby gate
- Feed meals on opposite sides of gate
- Practice obedience commands with distance maintained
- Watch for soft, loose body language (indicates readiness to progress)
Step 3 - Supervised Off-Leash Interaction (Week 3):
- Neutral outdoor space only initially
- Both dogs drag leashes (for quick intervention if needed)
- Duration: 5-10 minutes maximum first session
- Watch for healthy play signals: Play bows, taking turns chasing, soft mouths, voluntary pauses
Step 4 - Indoor Coexistence (Week 4+):
- Begin with brief indoor sessions
- Separate during meals, high-value chew times
- Never leave unsupervised until bond is solid (can take 3+ months)
For Dog-to-Cat Introductions:
| Phase | Action | Duration | Success Indicator |
|---|---|---|---|
| 1. Scent Only | Keep fully separated, swap bedding | 3-5 days | Both pets eat/act normally |
| 2. Visual Through Barrier | Baby gate meetings, cat up high | 1-2 weeks | Dog can be called away from gate |
| 3. Controlled Exposure | Dog on leash, cat free to approach/leave | 2-3 weeks | Dog responds to “Leave it” command |
| 4. Supervised Freedom | Both free, but monitored closely | Ongoing 1-3 months | Dog loses interest in chasing cat |
Critical command to teach immediately: “Leave it” vs. “No”
- “Leave it” = Disengage from what you’re focused on (more precise for prey-drive situations)
- “No” = General prohibition (less specific, can confuse the dog)
House Training and Boundary Setting: Preventing Destructive Behaviors
Even “house-trained” rescue dogs often have accidents initially due to stress, different home layouts, or lack of clarity about outdoor spots.
Comprehensive House Training Reset
Treat every rescue dog as if starting fresh:
1. Frequent outdoor trips (every 2 hours initially):
- Immediately after waking
- After meals (15-30 minutes)
- After play sessions
- Before bedtime
- Any time showing “sniffing circle” behavior
2. Designated potty spot strategy:
- Always use same area in yard
- Previous urine scent triggers elimination (classical conditioning)
- Use consistent verbal cue: “Go potty” or “Do your business”
- Immediate praise: “Yes, good potty!” the second they finish
3. Supervision is non-negotiable:
- Tether dog to you indoors with 6-foot leash
- Use baby gates to limit access to entire house
- Never punish accidents: This creates fear and sneaky elimination behaviors
- Clean accidents with enzymatic cleaner only (regular cleaners don’t eliminate scent markers)
4. Crate training for management:
- Dogs naturally avoid soiling their den space
- Crate size: Just enough to stand, turn around, lie down (larger = may potty in corner)
- Never use as punishment—make it their cozy retreat
Managing Destructive Chewing and Anxiety Behaviors
Why rescue dogs chew inappropriately:
- Anxiety relief (self-soothing behavior)
- Boredom/understimulation
- Teething (younger rescues)
- Exploration of new environment
Redirection protocol (not punishment):
❌ Ineffective approach: “No! Bad dog!” (too vague, increases anxiety)
✅ Effective approach:
- Interrupt calmly: “Ah-ah”
- Redirect immediately: Offer appropriate chew toy
- Praise when they take the toy: “Yes! Good chew!”
- Make appropriate items MORE appealing: Stuff KONG toys with frozen peanut butter
Providing appropriate outlets:
- Mental stimulation: Puzzle feeders, snuffle mats, training sessions
- Physical exercise: Age-appropriate: 30-60 minutes daily for adult dogs
- Calming activities: Lick mats with plain yogurt, long-lasting chews (bully sticks, dental chews)

Building Trust Through Positive Reinforcement Training
Positive reinforcement is the gold standard for rescue dogs because it builds confidence rather than increasing fear through corrections.
Core Training Philosophy for Rescue Dogs
Classical conditioning principle: Pair desired behaviors with rewards, making good choices inherently rewarding.
Your training toolkit:
-
High-value rewards hierarchy:
- Level 1 (everyday): Regular kibble, dog biscuits
- Level 2 (moderate distractions): Small cheese pieces, hot dog bits
- Level 3 (high distractions/fear work): Real chicken, freeze-dried liver, squeeze cheese
-
Marker training (clicker or “Yes!”):
- Marks the EXACT moment of correct behavior
- Bridges the gap between behavior and reward
- More precise than verbal praise alone
-
Release cues matter:
- “Okay” or “Free” = You’re released from the command
- Prevents confusion about when behavior ends
Essential Commands for Rescue Dog Success
Start with these foundational behaviors:
1. Name Recognition
Why it matters: Basis for all communication; builds connection
Training steps:
- Say dog’s name once
- The instant they look at you: “Yes!” + reward
- Repeat 10-15 times daily in low-distraction environment
- Gradually add distractions
- Never use their name for negative corrections (preserves positive association)
2. “Sit” (Impulse Control Foundation)
Why it matters: Default calm behavior; prevents jumping
Training steps:
- Hold treat at dog’s nose
- Slowly move treat up and back over their head
- As bottom hits floor: “Yes!” + reward
- Add verbal “Sit” once behavior is consistent
- Practice in different locations (generalization)
3. “Stay” (Building Self-Control)
Why it matters: Safety in doorways, vet visits, grooming
Training steps:
- Start with solid “Sit”
- Hold palm up (hand signal)
- Wait 2 seconds of stillness: “Yes!” + reward
- Gradually increase duration before release cue
- Add distance only after duration is solid
- Return to reward in position (don’t call them to you—this breaks the stay)
4. “Leave It” (Critical Safety Command)
Why it matters: Prevents eating dangerous items, chasing cats, lunging at triggers
Training steps:
- Show treat in closed fist
- Dog will sniff, lick, paw—ignore all attempts
- The second they pull back or look away: “Yes!” + reward with different treat
- Add verbal “Leave it” as they succeed
- Practice with dropped treats, toys, food on walks
- Never let them have the original item—this defeats the purpose
Practical example scenarios:
Scenario: Rescue dog lunges at another dog on walk
- Bad response: Pull harshly, yell “No!” (increases anxiety, creates negative association with other dogs)
- Good response: Create distance, say “Leave it,” immediately reward when they look at you, continue walking (teaches disengagement is rewarding)
Scenario: Dog jumps on visitors
- Bad response: Knee in chest, yell “Down!” (physical punishment damages trust)
- Good response: Ask visitors to ignore dog completely until all four paws on floor, then “Yes!” + attention reward (teaches calm greeting earns attention)
Socialization Timeline: When and How to Expand Their World
Common mistake: Overwhelming rescue dogs with too much, too soon. Patience is key!
Weeks 1-2: Decompression Period
Focus: Home environment only
- Limit visitors: Close family only
- Limit outings: Quick potty breaks, maybe one brief leash walk
- Priority: Establishing trust, routine, safe space
Weeks 3-4: Gradual Exposure
Focus: Low-stress, positive experiences
- Car rides: Short trips to positive destinations (park, not vet)
- Controlled walks: Quiet times of day, familiar routes
- Visitor introduction: One calm person at a time, let dog approach (never forced)
Months 2-3: Confidence Building
Focus: Expanding comfort zone systematically
- New environments: Pet-friendly stores, outdoor cafes (start at quiet times)
- Group classes: Positive reinforcement training classes (excellent controlled socialization)
- Dog park consideration: Only after solid recall and reading dog body language (many behaviorists recommend avoiding due to unpredictability)
Critical rule for all socialization: Always watch your dog’s body language. If you see stress signals (whale eye, tucked tail, excessive panting), immediately create distance or end the session. Quality over quantity—one positive 5-minute experience beats a traumatic 30-minute forced interaction.
Addressing Separation Anxiety: Prevention and Management
Separation anxiety is extremely common in rescue dogs who’ve experienced abandonment or multiple rehoming situations.
Recognizing True Separation Anxiety
Symptoms occurring ONLY when alone:
- Destructive behavior focused on exit points (doors, windows)
- Excessive vocalization (barking, howling, whining)
- House soiling despite being house-trained
- Self-injury attempts (broken nails, worn teeth from barrier chewing)
- Excessive drooling or panting
Not separation anxiety:
- Destructive chewing with you present (boredom/lack of training)
- Occasional barking (alert barking)
- Puppy accidents (incomplete house training)
Independence Training Protocol
Build alone-time tolerance gradually using systematic desensitization:
Week 1 - Room Separation:
- Step into bathroom, close door for 5 seconds
- Return calmly (no excited greeting—this creates contrast anxiety)
- If dog stayed calm: quietly reward
- Gradually increase to 30 seconds, then 1 minute
- Repeat with different rooms
Week 2 - Brief Departures:
- Put on shoes/coat (departure cues) but don’t leave—repeat until dog stays relaxed
- Walk to door, touch handle, return
- Step outside for 10 seconds, return
- Extend to 30 seconds, 1 minute, 3 minutes
- Never return during anxious behavior—wait for 3 seconds of quiet
Week 3-4 - Actual Absences:
- Leave for 5-minute real absence (actually leave property)
- Return calmly—no excited reunion
- Gradually extend: 10 min → 15 min → 30 min → 1 hour
- Vary departure times (unpredictability prevents anticipatory anxiety)
Management tools:
- KONG toys: Frozen with peanut butter—lasts 20-30 minutes
- Calming music: Through a Heartbeat Toy or calm classical music
- Crate training: Den security for some dogs (never force if crate-phobic)
- Camera monitoring: Furbo or similar to assess actual behavior
When to seek professional help: If your dog doesn’t improve after 4-6 weeks of training, shows self-injury, or has panic-level responses, consult a veterinary behaviorist. Medication combined with behavior modification is often necessary for severe cases.
Nutrition and Health Considerations During Adjustment
Stress significantly impacts appetite and digestion. Expect changes during the adjustment period.
Common Eating Issues in New Rescue Dogs
Refusing food (first 1-3 days):
- Normal stress response—don’t panic
- Offer small, frequent meals rather than large portions
- Try high-value toppers: Small amount of boiled chicken, plain pumpkin, low-sodium broth
- Hand feeding can build trust initially
- Seek vet help if: No eating for 24+ hours, lethargy, vomiting
Food guarding behaviors:
- Never punish resource guarding—this escalates aggression
- Feed in separate, quiet space away from other pets/people initially
- Practice “trade-up” game: Approach bowl, drop something better (chicken), walk away
- Consult professional trainer for systematic counter-conditioning plan
Dietary transition:
- Keep rescue on their original food first week (ask shelter/rescue what they were eating)
- Transition slowly over 7-10 days if changing: 75% old/25% new → 50/50 → 25% old/75% new → 100% new
- Prevents stress-related diarrhea from combining food change with environment change
Veterinary Care Schedule
First week priorities:
- Wellness exam: Even if rescue provided vet records
- Discuss behavioral concerns: Your vet may recommend anti-anxiety supplements or medications
- Confirm vaccinations: Ensure DHPP, Rabies, Bordetella are current
- Fecal test: Check for parasites (common in shelter environments)
- Heartworm test: If not recently completed
- Microchip check: Ensure it’s registered to YOU
Frequently Asked Questions
How long does it take for a rescue dog to fully trust you?
The 3-month milestone is typically when genuine bonding solidifies, but individual timelines vary dramatically based on the dog’s history. According to the ASPCA’s adoption adjustment research, dogs who experienced multiple rehomings or trauma may require 6-12 months to fully trust and attach. You can do this! Trust-building is not linear—you’ll see progress, setbacks, then breakthroughs. Key trust indicators include: seeking your presence for comfort, relaxed body language around you, showing belly voluntarily, bringing toys to you, and making direct eye contact without fear. Consistency is your superpower here—predictable responses to all situations gradually prove you’re safe. Never rush trust milestones; forcing affection before your dog is ready damages the foundation you’re building.
Should I let my rescue dog sleep in my bed immediately?
This decision depends on your long-term goals and your specific dog’s needs. If you want your dog on the bed permanently, allowing it from night one establishes this as normal. However, many behaviorists recommend starting with crate or dog bed sleeping for several reasons: (1) it provides a structured safe space during the overwhelming adjustment period, (2) it prevents potential resource guarding of the bed from developing, (3) it establishes healthy boundaries, and (4) it makes later transitions easier if needed. Middle-ground approach: Place your dog’s crate or bed directly next to yours for the first 2-3 weeks, maintaining proximity without bed sharing. This prevents separation anxiety while establishing boundaries. Patience is key! Once your dog shows confident, relaxed behavior and respects household rules consistently (usually 4-6 weeks minimum), bed privileges can be introduced if desired. Never use bed access as a reward or removal as punishment—this creates anxiety around sleeping arrangements.
What if my rescue dog shows aggression toward family members?
Any aggression requires immediate professional assessment—this is not a DIY situation. First, ensure everyone’s safety: Keep children and vulnerable family members separated from the dog using baby gates and controlled interactions only. Contact a certified veterinary behaviorist (DACVB) or certified professional dog trainer with aggression experience immediately. Common aggression triggers in rescue dogs include: fear-based reactivity (most common—looks like aggression but stems from terror), resource guarding (food, toys, spaces), pain-related aggression (underlying medical issue), or redirected frustration. Never punish aggressive displays—this typically escalates the behavior and damages trust irreparably. Until professional help arrives: (1) avoid situations that trigger the behavior, (2) ensure all interactions are positive and voluntary, (3) never corner or force interaction, (4) feed high-value treats for any calm behavior near triggers, and (5) maintain consistent routine for security. Many aggression cases improve dramatically with proper counter-conditioning protocols, but attempting this without expert guidance risks serious injury and worsening the behavior. You can do this with the right professional support team!
Final Thoughts: Celebrating Small Wins and Staying the Course
Every rescue dog’s journey is unique, but the destination is universal: a confident, secure, beloved family member who trusts you completely. The first month tests your patience—there will be accidents, chewed items, fearful reactions, and moments of doubt. This is completely normal!
Celebrate these small victories:
- First tail wag
- Eating a full meal
- Playing with a toy
- Sleeping soundly through the night
- Choosing to sit near you
- Making eye contact
- First successful recall
- Meeting another dog calmly
Each represents profound progress in your rescue dog’s healing journey. According to Alliance Therapy Dogs’ extensive rescue work, the dogs who struggled most initially often become the most bonded, loyal companions—they simply needed time to realize they’re finally safe.
Your commitment to following structured adjustment protocols, maintaining patience during setbacks, and providing consistent positive reinforcement creates the foundation for a transformational relationship. The 3-3-3 rule isn’t just a timeline—it’s a reminder that adjustment is a process, not an event.
You’re not just adopting a dog; you’re offering a second chance at the life every dog deserves. That’s heroic work, and your rescue dog will spend the rest of their life showing you gratitude in the language dogs speak best: loyalty, affection, and trust.
Keep going—you’ve got this, and your rescue dog is incredibly lucky to have found you! 🐾