Trim Black Dog Nails Safely: Step-by-Step Guide
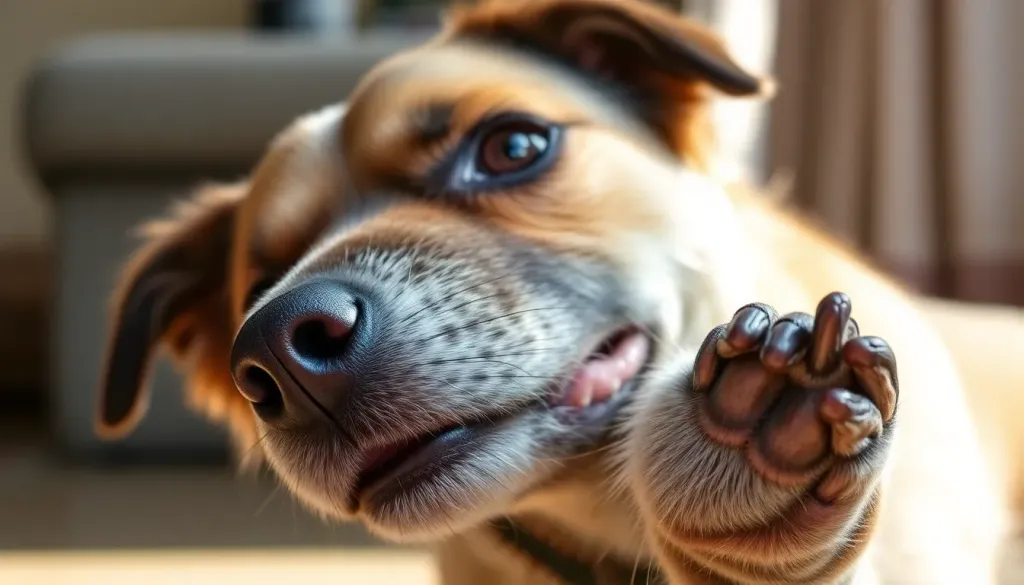
Trimming black dog nails is more challenging than trimming light-colored nails because you cannot see the quick (the blood vessel and nerve inside the nail) from the outside, requiring you to make very small cuts while carefully examining the nail’s interior for specific visual cues to avoid causing pain and bleeding. By taking tiny increments (1-2mm at a time) and watching for a small black or gray dot to appear in the center of the freshly-cut nail surface, you can safely trim black nails without hitting the quick.
Veterinary Disclaimer
Important: This article provides general guidance based on expert veterinary and grooming resources, but every dog is unique. If you’re uncertain about trimming your dog’s nails, have a dog with health conditions, or if bleeding doesn’t stop within 15-20 minutes after accidentally cutting the quick, please consult your veterinarian or a professional groomer immediately.
When I first adopted my black Labrador mix, Baxter, I was absolutely terrified of trimming his nails. Unlike my Golden Retriever, whose light-colored nails made it easy to see where the pink quick ended, Baxter’s jet-black nails were like trying to navigate in the dark. I remember holding his paw under the brightest lamp in my house, squinting at those solid black nails, and thinking, “How on earth am I supposed to know where to stop cutting?”
That fear is something I hear constantly from fellow multi-dog parents at the park. The struggle is real, and the anxiety is justified—nobody wants to hurt their beloved companion. But here’s what I’ve learned through years of experience, consultations with my vet, and plenty of trial and error: trimming black dog nails is absolutely manageable once you understand the technique and visual cues.
Why Trimming Black Dog Nails Matters More Than You Think
Before we dive into the how-to, let me share why this seemingly small grooming task is so crucial for your dog’s overall health and quality of life.
The Health Benefits of Properly Trimmed Black Nails
According to the American Kennel Club (AKC), regular nail maintenance is essential for your dog’s physical health and comfort. Here’s what proper nail care does for our four-legged family members:
Immediate Comfort and Mobility Benefits:
- Prevents pain and pressure: Long nails create constant pressure on the nail bed, causing soreness with every step your dog takes
- Maintains natural gait: Properly trimmed nails allow your dog to walk, run, and play with their natural posture intact
- Improves balance and traction: Shorter nails give your dog better grip on various surfaces, reducing slips and falls (especially important for senior dogs or homes with hardwood floors)
Long-Term Health Protection:
- Prevents joint problems: When nails are too long, they force the toes upward, altering your dog’s gait and putting abnormal stress on leg joints, which can contribute to arthritis development over time
- Maintains healthy paw structure: Overgrown nails can cause toes to splay or develop abnormal shapes, permanently affecting foot health
- Reduces injury risk: Long nails are prone to painful splitting, breaking, or snagging on carpet, furniture, or outdoor terrain
The Quick Recession Effect:
Here’s something fascinating I learned from my groomer: regular trimming actually encourages the quick to recede over time. PetMD explains that the blood vessel inside the nail will gradually shorten when you consistently maintain shorter nails, making future trims easier and allowing for a more manageable nail length overall.

What Happens When Black Nails Go Untrimmed
I learned this lesson the hard way with my rescue dog, Moose, who came to us with severely overgrown nails. The consequences of nail neglect can be serious:
| Issue | Impact on Your Dog | Timeline |
|---|---|---|
| Altered Gait | Unnatural walking posture, tiptoeing, strain on joints | Begins within weeks of overgrowth |
| Joint Stress | Pain in toes, ankles, knees, hips, and spine | Develops over 1-3 months |
| Nail Splitting/Breaking | Sudden, painful injuries that may expose the quick | Can happen anytime with long nails |
| Ingrown Nails | Nails curl and pierce paw pads, causing severe pain and infection | Occurs after several months of severe neglect |
| Arthritis Development | Chronic joint inflammation from prolonged abnormal gait | Long-term consequence (6+ months) |
| Behavioral Changes | Reluctance to walk, play, or climb stairs; increased anxiety | Progressive as discomfort increases |
One clear sign it’s time for a trim? When you can hear that distinctive “click-click-click” of nails on your hardwood or tile floors. According to the ASPCA, if your dog’s nails touch the ground when they’re standing normally, they’re too long.
Understanding the Unique Challenge of Black Dog Nails
Let me explain why black nails are genuinely more difficult than light-colored ones, because understanding this helps reduce the anxiety.
The Quick: Your Dog’s Sensitive Nail Core
The quick is a living tissue inside the nail containing blood vessels and nerves. In dogs with white or light-colored nails, the quick appears as a pink area that you can see through the nail—it’s like having a built-in guideline. But in black nails, the pigmentation completely obscures the quick from external view.
When I first brought my Golden Retriever home, I could trim her nails confidently because I could literally see exactly where to stop. With my black-nailed dogs, there’s no such luxury. You’re working with limited information, which is why technique becomes paramount.
The Risk: Cutting the Quick (And Why It’s Not the End of the World)
Let’s address the elephant in the room: yes, you might accidentally cut the quick, especially when you’re learning. I’ve done it. Most dog parents have. Here’s what actually happens:
Immediate Response:
- Your dog will likely yelp or pull their paw away—the pain is sharp but brief
- The nail will bleed, sometimes quite profusely, which can be alarming
- Your dog may be wary of nail trimming for the next session
Treatment Protocol (From My Emergency Kit):
I always keep styptic powder on hand, but I’ve also successfully used cornstarch or all-purpose flour in a pinch. Here’s my exact process:
- Stay calm (your dog picks up on your anxiety)
- Apply styptic powder or cornstarch directly to the bleeding nail tip
- Apply gentle but firm pressure with a clean cloth or paper towel for 30-60 seconds
- Keep your dog calm and still for 5-10 minutes to allow clotting
- Prevent licking of the area for at least 20-30 minutes (distraction with treats works well)
According to PetMD, while quicking causes bleeding and temporary discomfort, it’s rarely medically serious. The bleeding typically stops within 5-10 minutes with proper treatment. However, you should contact your veterinarian if:
- Bleeding continues for more than 15-20 minutes despite treatment
- Your dog shows signs of persistent limping or favoring the paw
- You notice swelling, heat, or discharge from the nail (signs of infection)
- Your dog seems excessively distressed or in severe pain
How to Trim Black Dog Nails: My Proven Step-by-Step Method
After trimming nails for three dogs with varying temperaments and nail colors over the years, I’ve refined a method that works consistently. This is the exact process I use every two weeks with my pack.
Essential Tools and Setup
What You’ll Need:
-
Quality nail clippers: I personally prefer scissor-style clippers for better control with thick black nails, though guillotine-style works for smaller dogs. The key is that they must be sharp—dull clippers crush rather than cut, causing pain and splintering.
-
Styptic powder (or cornstarch/flour backup): Non-negotiable. Even experienced groomers occasionally quick a nail.
-
High-value treats: I use small pieces of chicken or cheese—something my dogs go absolutely crazy for that makes nail time a positive experience.
-
Good lighting: I cannot stress this enough. I do nail trims near a large window during daylight hours, or under my brightest LED lamp at night.
-
Optional but helpful: A nail grinder (Dremel-type tool) for smoothing rough edges, and a helper to hold and reassure your dog.
Creating the Right Environment:
I’ve learned that setting matters enormously. Here’s my setup:
- Quiet space away from other pets and distractions
- Non-slip surface (I use a yoga mat) so my dogs feel secure
- Everything within reach so I never have to leave my dog mid-trim
- Relaxed timing when my dogs are naturally calm (post-walk is perfect)
Pre-Trim Preparation: The Foundation for Success
With my rescue Moose, who came with serious grooming anxiety, I spent two weeks just on desensitization before ever attempting a trim:
Desensitization Protocol:
- Days 1-3: Simply touch and hold each paw for a few seconds, giving treats and praise
- Days 4-6: Gently press on each nail bed, continuing positive reinforcement
- Days 7-10: Introduce the clippers—let your dog sniff them, click them near (not on) the nails, reward heavily
- Days 11-14: Touch the clippers to each nail without cutting, massive treats and praise
This investment of time transformed nail trimming from a wrestling match into a manageable routine.

The Actual Trimming Technique: How to Trim Black Dog Nails Safely
This is where the magic happens. The technique I’m about to share comes from consultation with my veterinarian and a professional groomer who has worked with dogs for over 20 years.
Step 1: Positioning
- Sit or kneel beside your dog (I prefer having them stand or sit, not lying down)
- Gently but firmly hold the paw you’re working on
- If your dog has long fur between the pads, gently push it back or trim it so it doesn’t obstruct your view
Step 2: The Small-Cut Approach
This is absolutely critical for black nails: Take tiny cuts of only 1-2 millimeters (about 1/16th of an inch) at a time. I know it seems tedious—and it is—but this conservative approach is what prevents quicking.
- Position the clippers at roughly a 45-degree angle, cutting from top to bottom (never side to side)
- Make your first small cut near the obvious end of the nail
- After each cut, examine the freshly exposed nail surface head-on
Step 3: Reading the Nail Interior (The Game-Changer)
Here’s what transformed my black nail trimming from guesswork to science. After each small cut, look directly at the cut surface of the nail. You’re looking for a specific progression:
Visual Progression Guide:
| What You See | What It Means | What to Do Next |
|---|---|---|
| Hard, solid black outer ring | You’re still in the outer nail sheath (keratinized dead tissue) | Safe to continue cutting with small increments |
| Softer, chalky white or gray interior appears | You’re getting into the nail “horn” but still safe | Continue cutting, but remain vigilant |
| Small black, gray, or pink dot appears in the center of the white/gray area | STOP! You’re extremely close to the quick | This is your stopping point for this nail |
| Moisture or any pinkness | You’ve reached or just grazed the quick | Immediately stop cutting this nail |
The appearance of that small central dot is your definitive signal. I’ve learned to stop the moment I see it. According to the AKC, this dot indicates you’re within 1-2 millimeters of the quick—close enough that your dog’s nail is at an appropriate length.
Step 4: The Cross-Reference Method
If your dog has even one clear or light-colored nail (like my Baxter, who has one white dewclaw among all black nails), use that as your reference guide. Trim the clear nail first to see exactly how far the quick extends, then use that measurement as a general guide for the black nails—but still proceed cautiously with the small-cut method.
Step 5: Don’t Forget the Dewclaws
This is something I initially overlooked with disastrous results—Moose’s dewclaw grew so long it actually started curling toward his leg. Dewclaws don’t touch the ground, so they never wear down naturally. They require the same careful trimming technique.
Alternative Method: Using a Nail Grinder
After my first quicking incident with clippers, I experimented with a Dremel-style grinder, and many of my dog-parent friends swear by this method for black nails.
Grinder Advantages:
- More gradual removal allows better control
- Simultaneously smooths the nail (no sharp edges)
- Less risk of sudden quicking
- Better for anxious dogs who fear the “clip” sensation
Grinder Technique:
- Start with the bottom of the nail, grinding the underside at an angle
- Watch for the same visual cues (the central dot appearing)
- Move to the tip to round and smooth
- Keep the grinder moving—don’t hold it in one spot (can cause heat discomfort)
- Be prepared for the noise (some dogs hate it; gradual desensitization helps)
Note for Long-Haired Breeds: If you have a dog like my neighbor’s Shih Tzu, be extremely careful with grinders—the rotating tool can catch and wrap long fur, which is painful and scary. Always trim or firmly hold back fur around the paws before grinding.
My Personal Routine: What a Successful Nail Trim Looks Like
Here’s exactly how I handle nail day with my three dogs:
Before trimming:
- 30-minute walk to tire them out and take the edge off their energy
- Gather all supplies on my coffee table
- Cue words: “Nail time!” (said cheerfully) followed by showing them the treat bag
During trimming:
- I trim 2-3 nails, then break for treats and praise
- If any dog shows stress signs (panting, trying to pull away, whale eye), we stop and resume later
- I talk to them constantly in a calm, happy voice
- Total time per dog: 10-15 minutes for all four paws
After trimming:
- Extra special treat (frozen Kong stuffed with peanut butter)
- Lots of praise and cuddles
- Brief paw inspection to ensure no sharp edges
Frequency: How Often Should You Trim Black Dog Nails?
According to PetMD, most dogs need nail trims every 2-4 weeks. But here’s what I’ve learned through experience:
Factors Affecting Frequency:
- Activity level: My younger Lab mix wears his nails down faster running at the dog park than my senior Retriever who prefers gentle walks
- Surface type: Dogs who walk primarily on concrete need less frequent trims than those on grass or carpet
- Individual growth rate: Just like human nails, some dogs’ nails grow faster
- Current nail length: If you’re dealing with overgrown nails, you may need more frequent trims initially to encourage the quick to recede
The Click Test: My go-to method for knowing when it’s trim time is the sound test. If I hear clicking on my hardwood floors when my dogs walk, they’re overdue. Nails should not touch the ground when the dog is standing on a flat surface.
Building a Positive Association: Training Tips That Actually Work
My rescue Moose was terrified of nail trimming when we adopted him. Here’s what worked to transform his anxiety:
Counter-Conditioning Protocol:
- Pair clippers with amazing things: Every time Moose saw the clippers, he got his absolute favorite treat (freeze-dried liver), even with no trimming happening
- Go slower than you think necessary: Sometimes we’d only trim one nail per session for the first month
- End on a positive note: Always stop before your dog reaches their stress threshold
- Never punish or force: If your dog is genuinely panicked, pushing through damages trust for future sessions
When to Seek Professional Help:
There’s absolutely no shame in having a groomer or vet tech handle nail trims. I regularly recommend this to friends whose dogs have severe anxiety or who have had traumatic quicking experiences. Many vet offices offer quick nail trim appointments for $10-15, and it’s worth it for everyone’s mental health.
Handling Common Challenges with Black Dog Nails
Challenge 1: Severely Overgrown Nails
When I adopted Moose, his nails had clearly been neglected for months. They were so long they curled, and the quicks had extended far down into the nails.
The Solution—Gradual Quick Recession:
- Trim very conservatively every 7-10 days (instead of every 2-3 weeks)
- Only remove the minimum amount each session
- Over 2-3 months, the quick will gradually recede, allowing progressively shorter trims
- Consider professional help for the initial trim if nails have grown into paw pads
Challenge 2: The Anxious or Fearful Dog
Some dogs simply cannot tolerate nail trimming at home, and that’s okay. But here are strategies that have helped my anxious dogs:
- The “bucket game”: Train your dog to voluntarily place their paw in your hand for extended periods using positive reinforcement
- Medication: For severe anxiety, talk to your vet about mild sedation options for nail trims (I used this initially with Moose)
- Distraction licking mats: Spread peanut butter or canned dog food on a lick mat to occupy your dog during trimming
- Two-person approach: One person for treats and reassurance, one for trimming
Challenge 3: The Dog Who Won’t Stay Still
My young Lab mix is a wiggle-monster. Here’s what works:
- Tire them out first: A vigorous play session or long walk beforehand makes a huge difference
- Secure positioning: For small dogs, having them in your lap works well; for larger dogs, having them stand or sit against a wall limits backward movement
- Short sessions: Better to trim 5 nails today and finish tomorrow than to fight through a stressful 20-nail marathon
FAQ: Your Black Dog Nail Trimming Questions Answered
How do you know where the quick is in black dog nails?
You cannot see the quick from the outside of black nails, which is why the internal visual method is essential. After making each small cut (1-2mm), examine the cut surface of the nail head-on. Initially, you’ll see only solid black or a hard outer ring. As you cut closer to the quick, a softer, chalky white or grayish interior will appear. Your stopping point is when you see a small black, gray, or pink dot emerge in the center of this lighter interior area—this dot indicates the quick’s edge, and you’re close enough.
I also use my dogs’ clear nails (if they have any) as a reference guide. By trimming a clear nail first and observing how far the pink quick extends, I get a general sense of the appropriate length for the black nails. However, I still proceed with the small-cut method and visual examination on every black nail because quick placement can vary even on the same dog.
What should I do if I accidentally cut the quick on my dog’s black nail?
First, stay calm—your dog needs you to be their steady presence. I’ve cut the quick several times over the years, and here’s my proven emergency response: Immediately apply styptic powder (or cornstarch/flour if you don’t have styptic powder) directly to the bleeding nail tip with firm, gentle pressure using a clean cloth or paper towel. Hold pressure for about 30-60 seconds. Keep your dog calm and relatively still for the next 5-10 minutes to allow proper clotting—I use this time for gentle petting and soothing talk.
The bleeding typically stops within 5-10 minutes. PetMD emphasizes that while quicking is painful and scary, it’s rarely medically serious. However, contact your veterinarian if bleeding continues beyond 15-20 minutes, if your dog shows persistent limping or excessive pain, or if you notice any signs of infection (swelling, discharge, heat) in the following days.
After a quicking incident, I always make the next nail session extra positive—shorter, with more treats—to prevent my dog from developing lasting fear around nail trimming.
Can you use a regular nail grinder on black dog nails, and is it safer than clippers?
Yes, you can absolutely use a nail grinder (Dremel-type tool) on black dog nails, and many groomers consider it safer for beginners because it removes nail material more gradually, giving you better control and reducing the risk of suddenly cutting too deep. I personally rotate between clippers and a grinder depending on which dog I’m working with—my anxious rescue does better with the grinder’s gradual approach, while my calm Golden tolerates clippers just fine.
Grinder technique for black nails: Start by grinding the bottom/underside of the nail at an angle, watching for the same visual cues you’d watch for with clippers (the appearance of the lighter interior and eventually the central dot). Then move to the tip to round and smooth it. The advantage is you can feel and see your progress more gradually. Keep the grinder moving constantly rather than holding it on one spot to avoid heat buildup, which can be uncomfortable for your dog.
Important considerations: The grinder makes noise and creates vibration that some dogs absolutely hate—gradual desensitization is crucial. According to the ASPCA, you should introduce the grinder slowly over several sessions, starting with just turning it on near your dog (with treats) before ever touching their nails. Also, if you have a long-haired breed like my neighbor’s Havanese, be extremely cautious because the rotating tool can catch and wrap hair, which is painful and frightening. Always trim or firmly secure long fur away from the paws before using a grinder.
Final Thoughts: You’ve Got This
Looking back at my journey from terrified nail-trimming novice to confident multi-dog parent who handles this grooming task every two weeks, I can promise you this: it gets easier. That first time I successfully trimmed all of Baxter’s black nails without a single yelp, I literally did a victory dance in my living room.
The key takeaways from my years of experience:
✓ Small cuts are your best friend—1-2mm increments every time, no exceptions ✓ Learn to read the nail interior—that small central dot is your stopping point ✓ Patience and positive reinforcement build cooperation better than any restraint technique ✓ Regular maintenance makes it easier—every 2-3 weeks keeps quicks receded and nails manageable ✓ It’s okay to ask for help—professional groomers and vet techs are there for a reason
Remember, every dog is different, and what works perfectly for my Lab might need adjustment for your Rottweiler or Poodle. Pay attention to your dog’s individual signals, go at their pace, and celebrate small victories.
Your dog’s comfort, mobility, and health depend on proper nail care, and by mastering the black nail technique, you’re giving them the gift of pain-free paws for life. Trust me, when you see your senior dog running around with renewed spring in their step after months of consistent nail maintenance, you’ll understand why this seemingly small grooming task matters so much.
Now grab those clippers, take a deep breath, and remember: small cuts, bright light, watch for the dot, and lots of treats. You’ve absolutely got this! 🐾